
Jewelry making is a timeless and rewarding craft that allows individuals to create personalized and beautiful pieces of art. Whether you’re a complete beginner or someone with a bit of crafting experience, using the right tools and materials is crucial for achieving professional results.
One such indispensable tool in the realm of jewelry making is Loctite adhesive. Known for its strong bonding capabilities and versatility, Loctite can make your jewelry crafting experience seamless and enjoyable. This guide will walk you through the essentials of using Loctite for various types of jewelry, offering detailed instructions, safety tips, and showcasing some stunning project ideas.
Essential Tools and Materials
Before diving into specific projects, it’s important to gather all the necessary tools and materials. Here’s a comprehensive list to get you started:
Tools:
- Pliers (Round-nose, flat-nose, and wire cutters): Essential for bending, shaping, and cutting wire.
- Jewelry findings: Includes items like jump rings, clasps, earring hooks, and bead caps.
- Mandrels and ring sizers: Useful for shaping rings and bracelets.
- Beading needles: Required for intricate beadwork.
- Jewelry making mat or tray: Keeps your workspace organized and prevents beads from rolling away.
Materials:
- Loctite adhesive: Choose the appropriate type based on your project. Loctite Super Glue Gel Control is a versatile option suitable for many materials.
- Beads, gemstones, and charms: The main decorative elements of your jewelry.
- Wire (Various gauges): Used for stringing beads, creating chains, and other structural elements.
- Chains and cords: For necklaces, bracelets, and anklets.
- Metal sheets and blanks: Can be stamped, shaped, and used as pendants or charms.
Detailed Instructions on Using Loctite for Jewelry Making
Loctite adhesives are known for their strong and reliable bonds, making them perfect for jewelry making. Here’s a step-by-step guide on using Loctite for different types of jewelry.
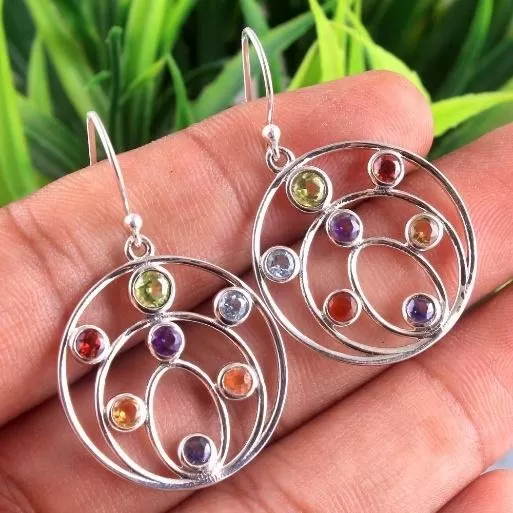
Earring Creation
Materials Needed:
- Earring hooks
- Decorative beads or charms
- Headpins or eyepins
- Loctite Super Glue Gel Control
Steps:
- String the Bead or Charm: Start by stringing your chosen bead or charm onto a headpin or eyepin.
- Secure the Bead: Using round-nose pliers, create a small loop at the top of the headpin to secure the bead in place.
- Attach to Earring Hook: Open the loop at the bottom of the earring hook with flat-nose pliers and attach the headpin loop. Close the loop securely.
- Apply Loctite: Add a small drop of Loctite Super Glue Gel Control to the loop connection to ensure it stays secure. Allow it to dry completely before wearing.
Necklace and Bracelet Making
Materials Needed:
- Chain or cord
- Decorative pendants or beads
- Jump rings and clasps
- Loctite Super Glue Gel Control
Steps:
- Measure and Cut: Measure and cut your chain or cord to the desired length.
- Attach the Clasp: Open a jump ring with flat-nose pliers, slide on the clasp, and attach it to one end of the chain. Close the jump ring securely.
- Add Pendants or Beads: Use additional jump rings to attach pendants or beads to the chain. Ensure each jump ring is closed tightly.
- Secure Connections: Apply a small drop of Loctite Super Glue Gel Control to each jump ring connection to reinforce the bond. Let it dry thoroughly.
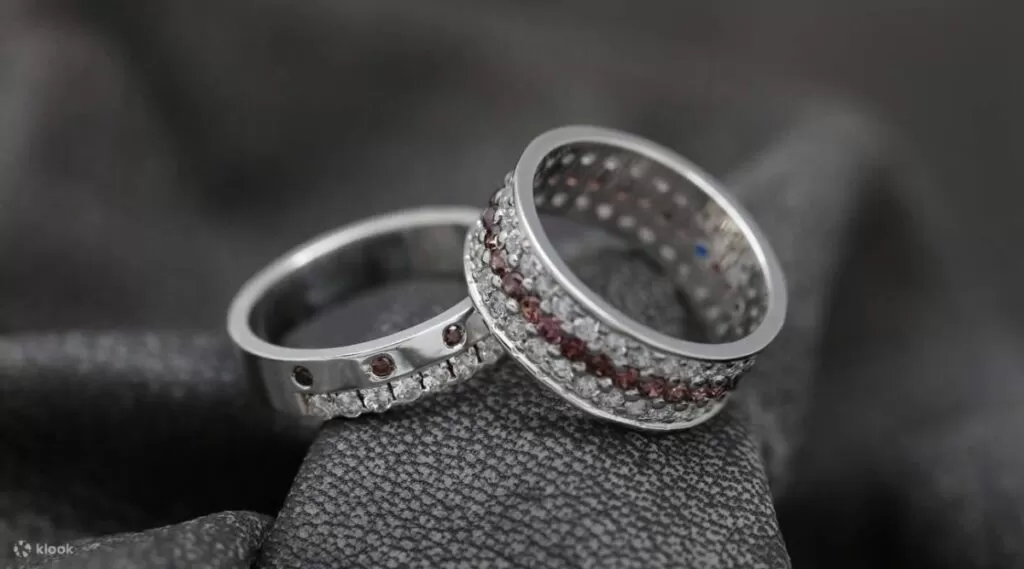
Ring Crafting
Materials Needed:
- Ring blank or wire
- Decorative stones or beads
- Loctite Super Glue Gel Control
Steps:
- Prepare the Ring Blank: If using a wire, shape it into a ring using a mandrel and ensure it fits your desired finger size.
- Attach the Stone or Bead: Place a small drop of Loctite Super Glue Gel Control on the ring blank where the stone or bead will sit.
- Position the Stone: Carefully position the stone or bead onto the adhesive. Hold it in place for a few seconds to ensure it sets.
- Allow to Dry: Let the ring dry completely before wearing to ensure the adhesive has fully cured.
Safety Tips and Best Practices
Using Loctite adhesives in jewelry making is generally safe, but it’s important to follow some best practices to ensure both the safety and quality of your projects.
Safety Tips:
- Work in a Well-Ventilated Area: Ensure your workspace is well-ventilated to avoid inhaling fumes from the adhesive.
- Use Sparingly: A little Loctite goes a long way. Use small amounts to avoid excess spillage.
- Wear Protective Gear: Consider wearing gloves to protect your skin from accidental contact with the adhesive.
- Keep Away from Children: Store Loctite and other crafting tools out of reach of children to prevent accidental ingestion or injury.
Best Practices:
- Clean Surfaces: Ensure all surfaces are clean and dry before applying Loctite to achieve the strongest bond.
- Test on Scrap Material: If you’re unsure how Loctite will interact with your materials, test it on a small scrap piece first.
- Store Properly: Keep the adhesive capped tightly when not in use to prevent it from drying out.
Showcasing Completed Projects
Once you’ve completed your jewelry pieces, it’s time to showcase them. Here are a few ideas to help you present your handmade jewelry:
Photography Tips:
- Use Natural Light: Natural light is best for capturing the true colors and details of your jewelry.
- Simple Backgrounds: Use simple, uncluttered backgrounds to make your jewelry stand out.
- Close-Ups: Take close-up shots to highlight intricate details and craftsmanship.
Display Ideas:
- Jewelry Stands: Use jewelry stands or busts to display necklaces and earrings.
- Gift Boxes: Package your jewelry in elegant gift boxes for a professional touch.
- Craft Fairs and Markets: Consider selling your creations at local craft fairs or markets to reach a wider audience.
Conclusion
Jewelry making with Loctite adhesives opens up a world of creative possibilities. From elegant earrings to intricate rings, the strong and reliable bonds provided by Loctite ensure your creations are both beautiful and durable.
By following the detailed instructions and safety tips provided in this guide, even beginners can achieve professional-looking results. So gather your materials, unleash your creativity, and start crafting stunning jewelry pieces today.For more information on Loctite products and where to purchase them, visit Hong Teck Hin.